In this tutorial, you are going to learn how to install the Google Analytics 4 (GA4) base tag on your website using Google Tag Manager.
How to add the Google Analytics 4 base tag to your website with Tag Manager
-
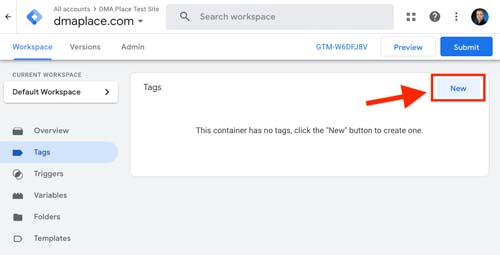
Open Google Tag Manager. From the left menu, choose “Tags”.
-
Click “New” to add a new tag.

-
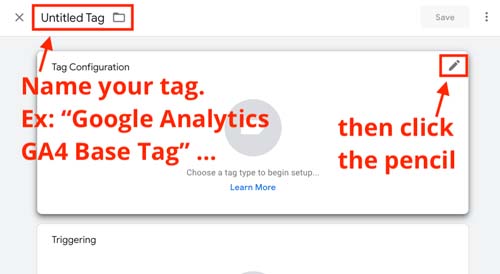
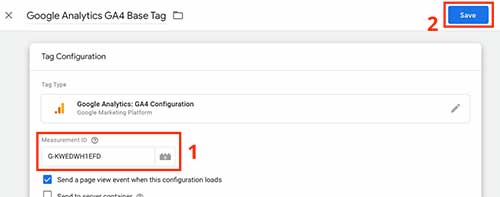
Name your tag. For example, “Google Analytics GA4 Base Tag” then click the pencil to choose the tag type.

-
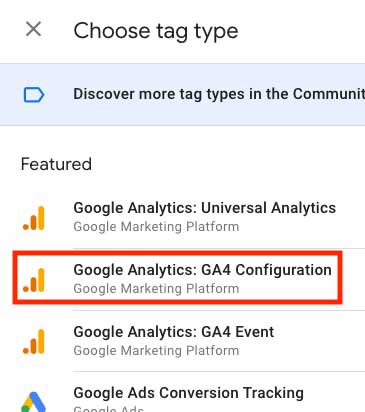
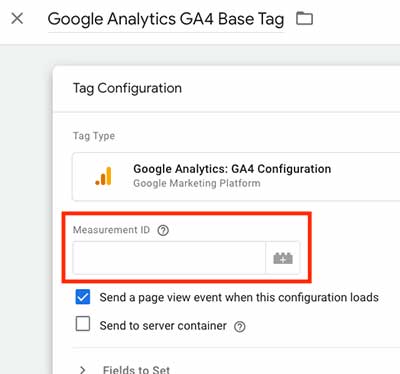
Choose “Google Analytics: GA4 Configuration – Google Marketing Platform”.

-
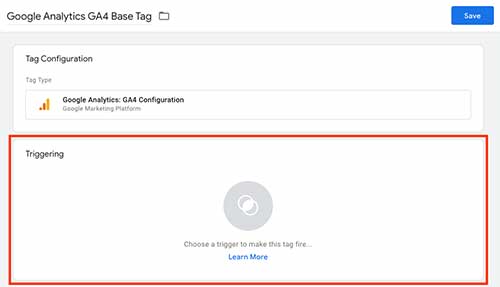
Click the “Triggering” section.

-
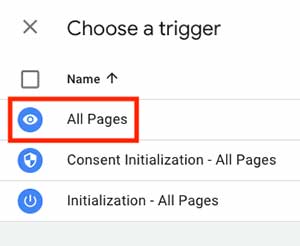
Choose “All Pages” as a trigger.

-
Click the “Tag Configuration” section again (you still need to enter the “Measurement ID”).

-
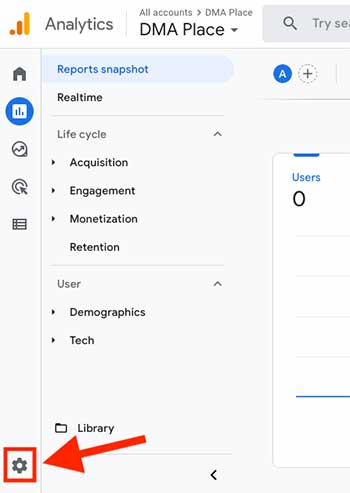
To get the ID, navigate to your Google Analytics 4 account and choose “Admin” (gearwheel icon) at the bottom left of the screen.

-
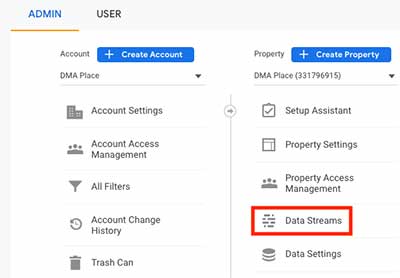
In the “Property” column, click “Data Streams”.

-
Click your Data Stream. If you don’t have any, click the “Add stream” button and follow the instructions.

-
From the “Stream details” section, copy the Measurement ID by clicking the “copy” icon next to it.

-
Go back to Google Tag Manager and insert the ID into the “Measurement ID” field and click “Save” to save your tag.

-
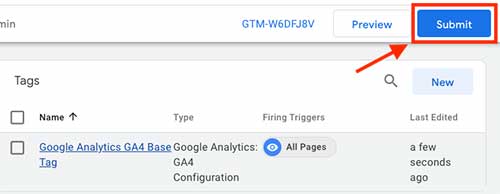
Click “Submit”.

-
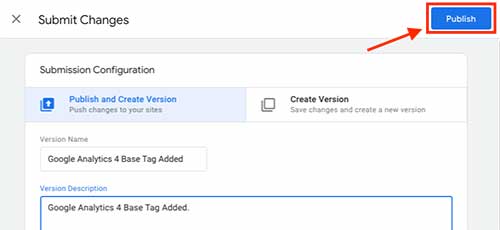
Add a name and description to your version (for better control and future reference).
-
Click “Publish”.

How to check if tag installation was successful
After publishing your GA4 tag, you need to make sure it was successfully installed (i.e. the tag has to be fired when there is a page hit).
Open Google Chrome and install the Google Tag Assistant Legacy extension. If you use another browser, just look for a similar tag assistant extension.
After installing the extension, click its icon on the top bar and choose “Enable”.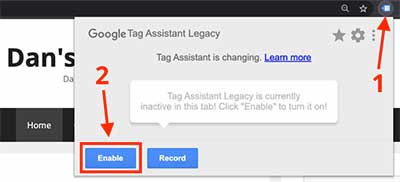
Now refresh your window and click the icon again. You should now see the “Global site tag (gtag.js)“, which is the GA4 tag, and any other Google tags your website has.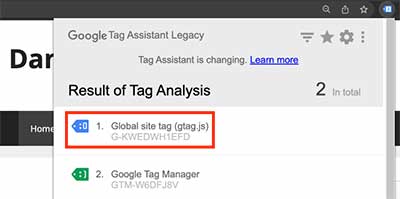
Warning
Some browser extensions may block Google tags and prevent them from showing, such as the ones below:
- ad blockers in general;
- “Simple Allow Copy” (to enable right-click on protected content) and similar.
If you use any of these extensions, turn them off while you run Google Tag Assistant Legacy, then turn them on again.
How to check if your Google Analytics 4 account is receiving data from your website
Keep in mind
It may take several hours for your Google Analytics 4 account to start receiving traffic data from its tag on your website.
If you’ve already checked the tag installation and know it was successful but you still don’t see any data in GA4, don’t worry. Visitors might be still getting the “old” version (without the tag) of your website because of your server cache settings.
Wait a few hours, go back to Analytics and your website’s data collection should be active.
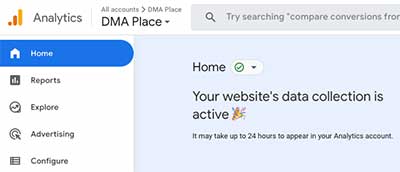
To check if your GA4 account is receiving data from your website, just visit Analytics’s Home tab.
If you see a message such as the one below (saying “Your website’s data collection is active. It may take up to 24 hours to appear in your Analytics account.”), it means your tag is sending data from your website to Analytics.
You’re all set!

